How to create a document element
JumpLMS supports the Microsoft suite of documents including Word Documents, Excel Spreadsheets, and Powerpoint presentations. You can also import PDFs. Once you’ve imported the document, your learners can view them in the course or download them (if you let them).
To add a document element follow these steps:
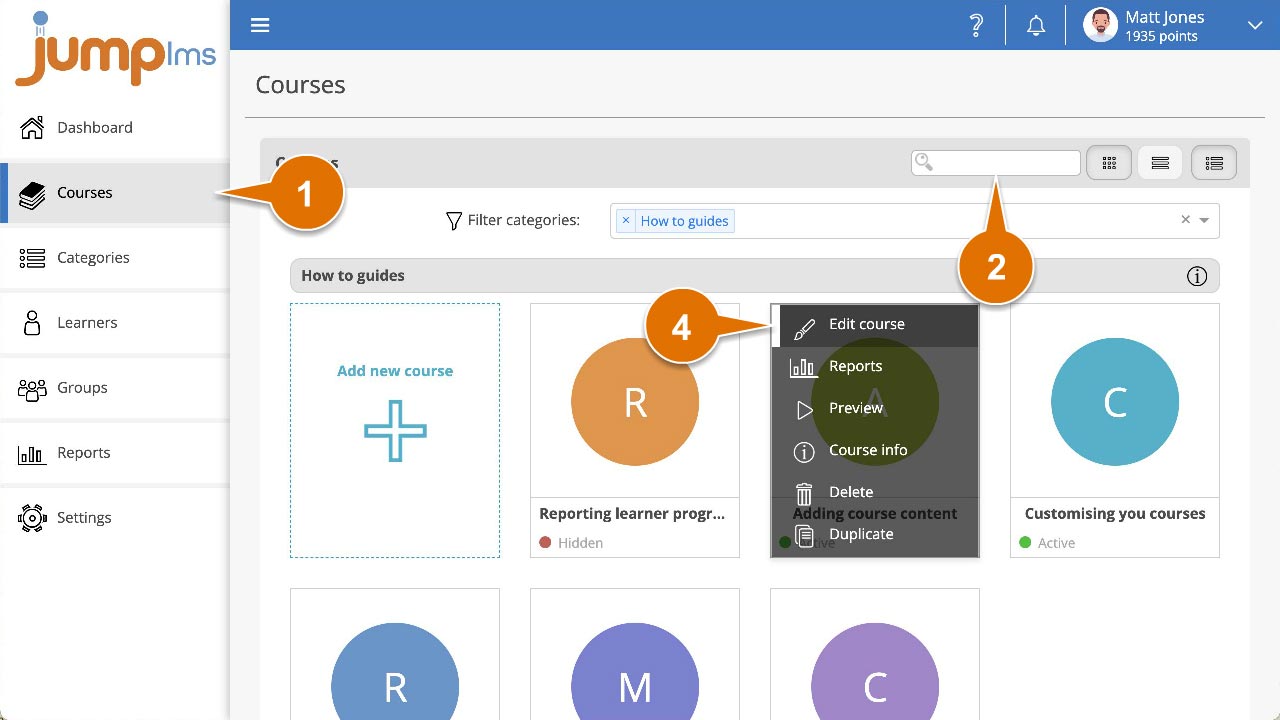
1. Click on the Courses tab.
2. Search for the course you want to add the element to or find it in the list.
3. If you’re using a touchscreen device, click the course’s thumbnail or if you’re using a computer, hover the cursor over it.
4. Click Edit course.
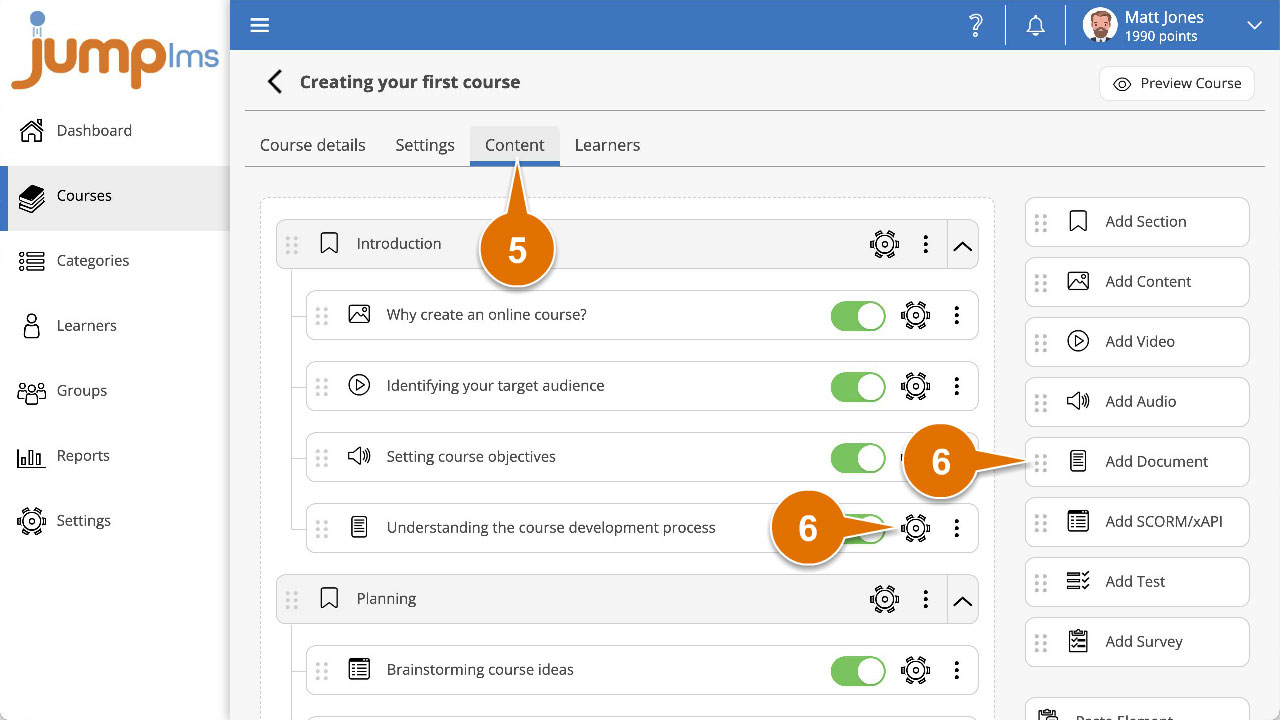
5. Click on the Content tab.
6. Click on Add Document to add the element to the end of the course structure or drag and drop it to the desired place. Then click Edit.
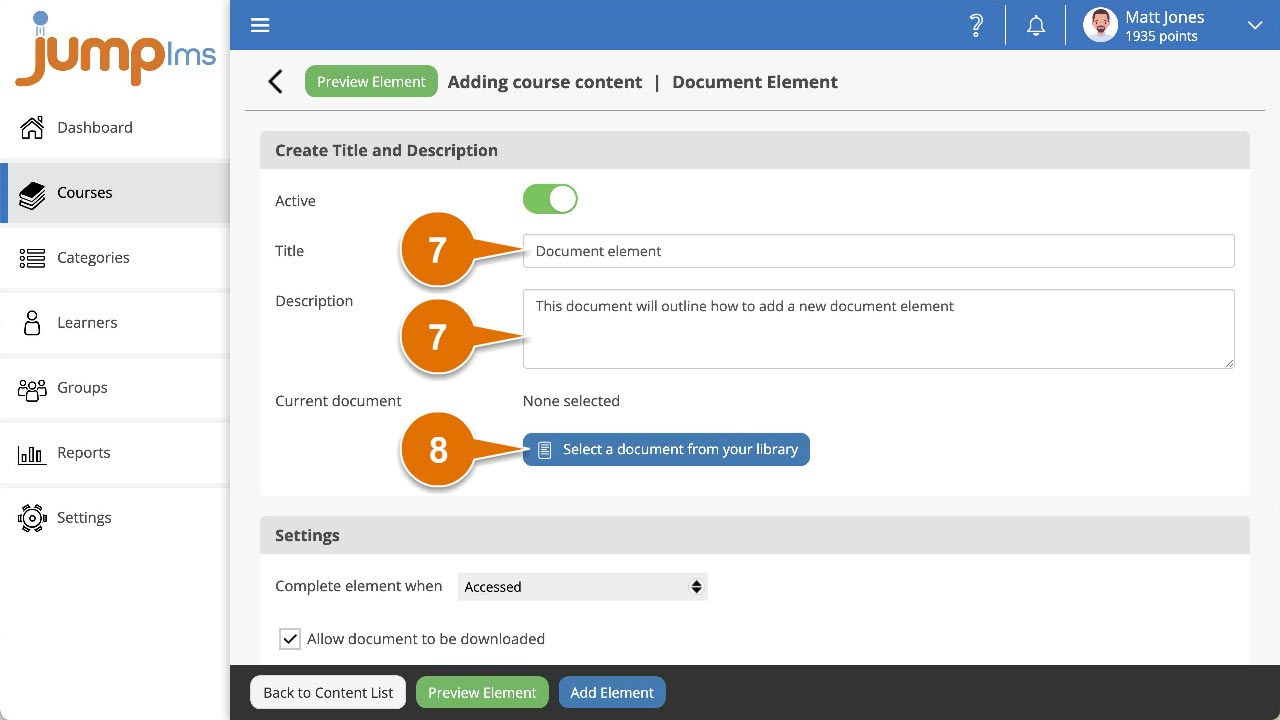
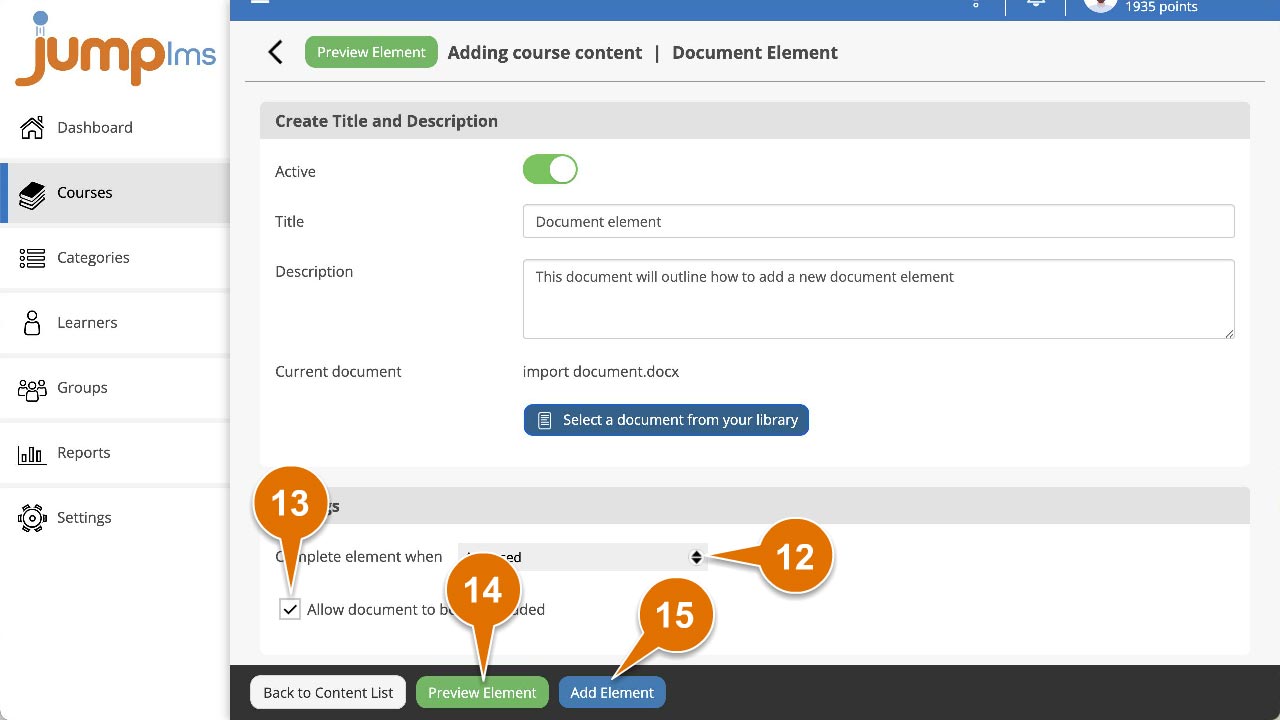
7. Enter a title and description for the element.
8. Click Select a document from your library to open your Resource Library.
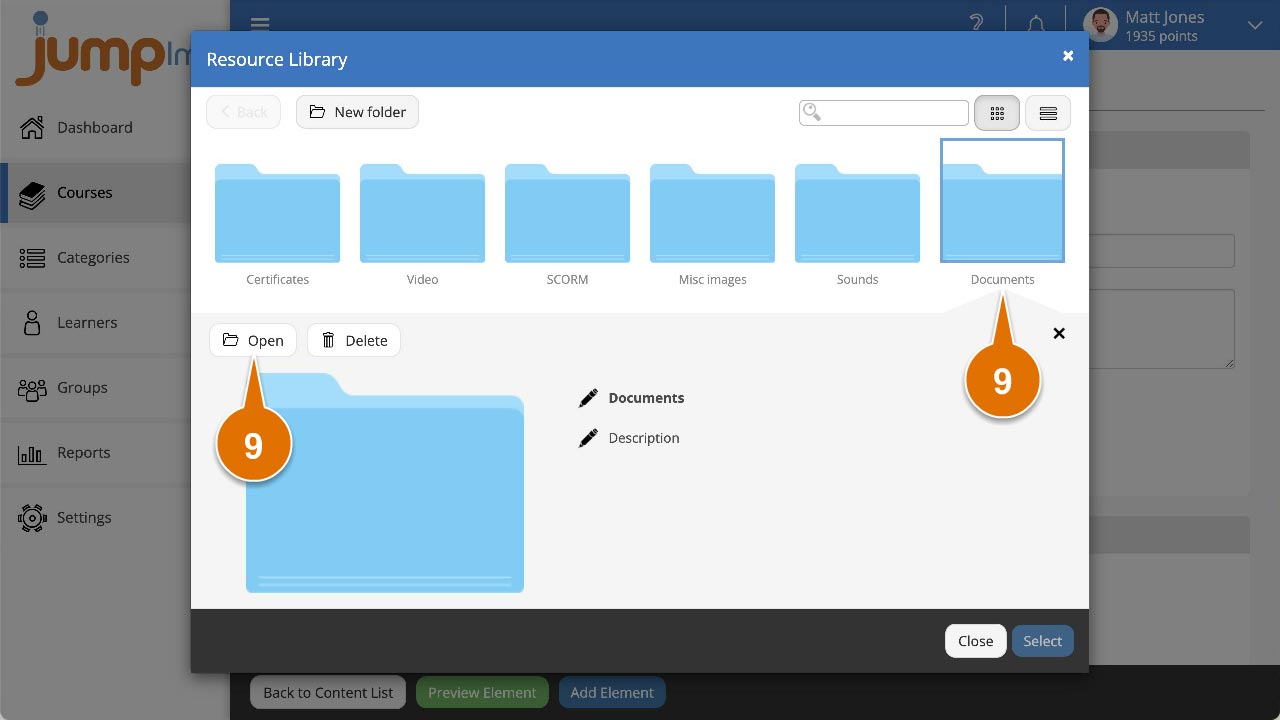
9. Double click the folder where you want to import the document to, or single click it and click Open.
10. Click Import and browse to the location of your document, or drag and drop it directly into the drop zone.
11. When the document has finished importing, click it and click Select.

12. You can set the completion criteria for this element in the Settings panel by selecting the appropriate option from the Complete element when dropdown.
13. You can let your learners download the document by ticking the box labelled Allow document to be downloaded
14. Click Preview Element if you want to see how the element will look in the course.
15. Click Add Element.
The document element will now be part of your course.