How to customise the course player
You can customise your courses in various ways, this is a great way to help set each course apart.
Colour scheme
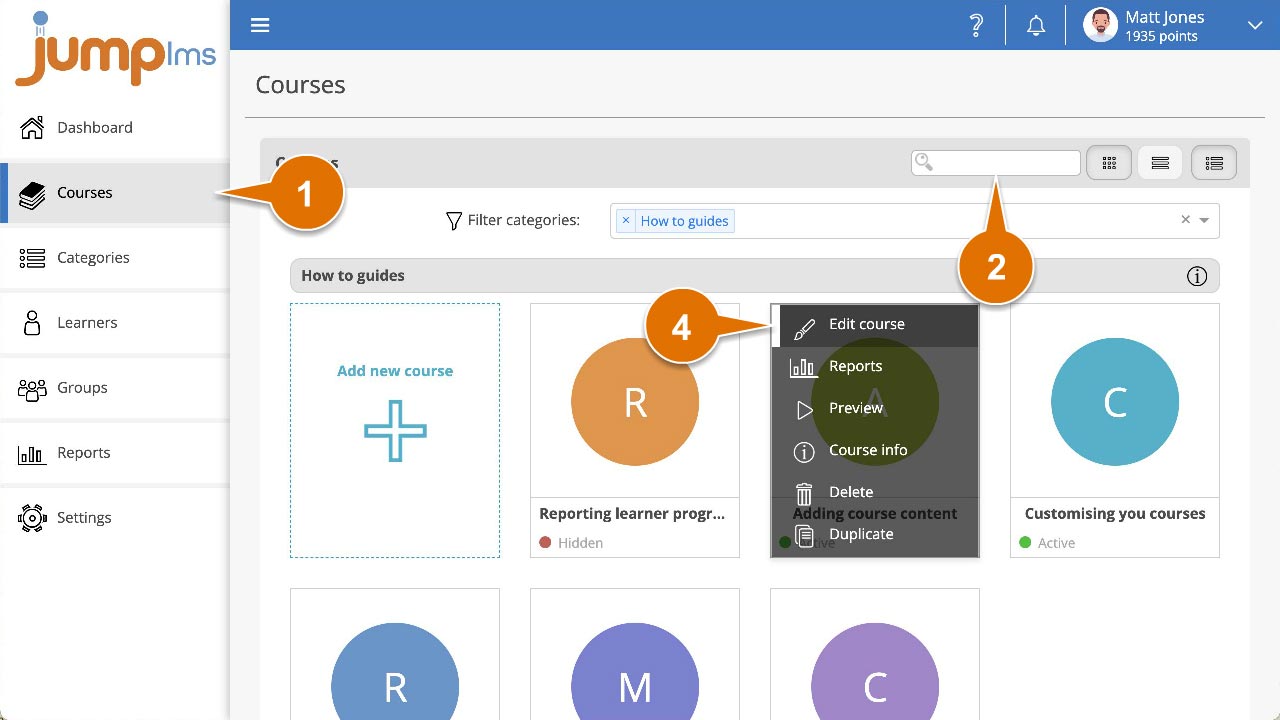
When you create a new course, it will automatically use the same colour scheme that you currently have applied to your JumpLMS portal. To change the colour scheme for a single course, follow these steps:
1. Click on the Courses tab.
2. Search for the course you want to customise.
3. If you’re using a touchscreen device, click the course’s thumbnail or if you’re using a computer, hover the cursor over it.
4. Click Edit course.
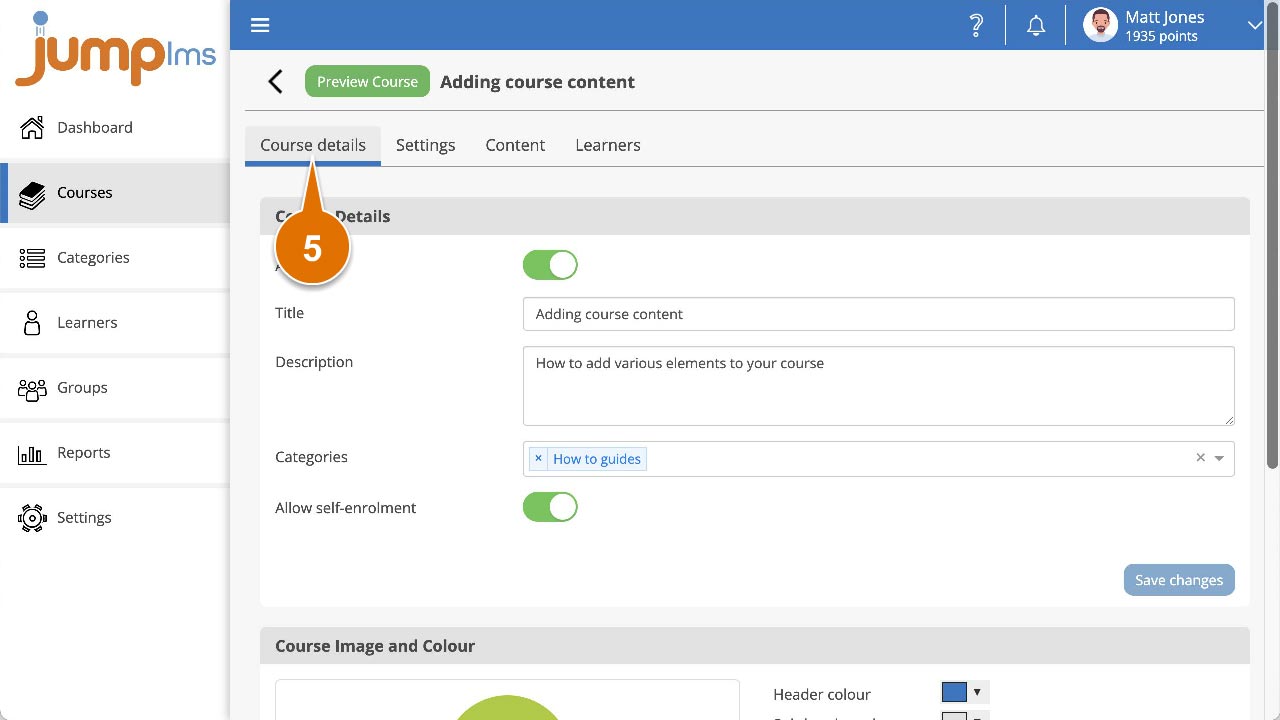
5. Click on the Course details tab.
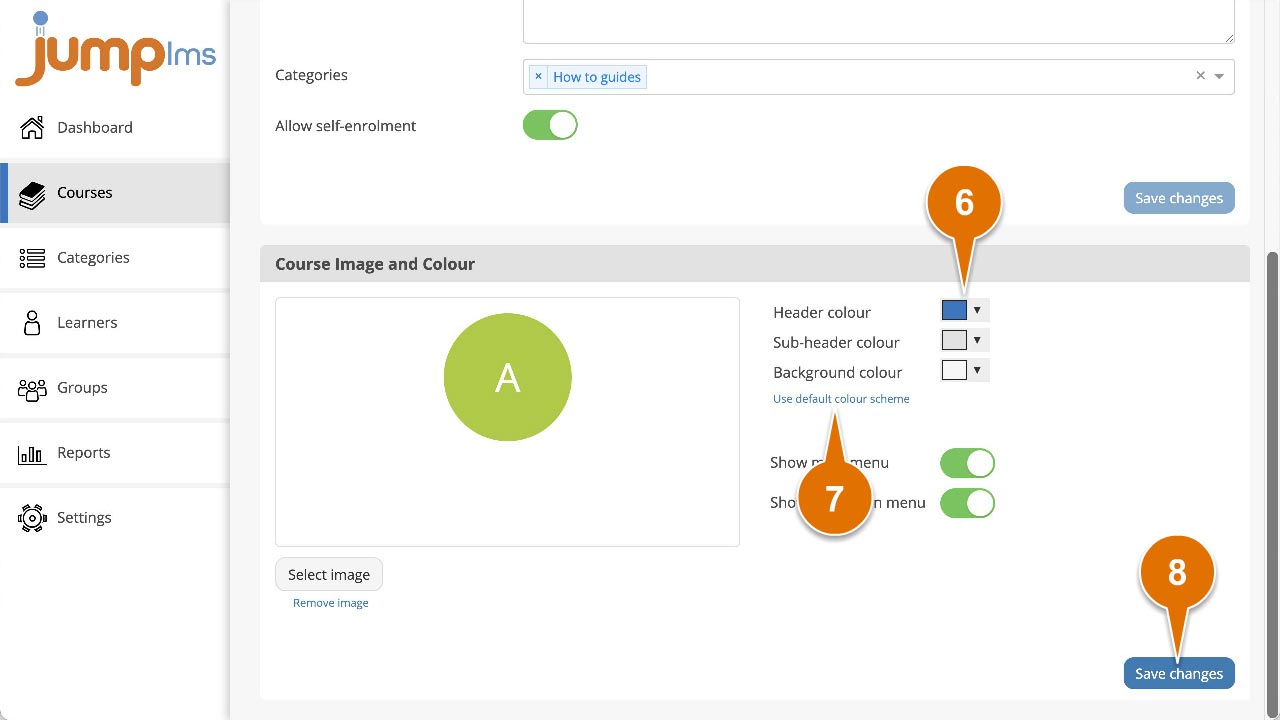
6. Click on the header, sub-header or background colour swatch to select the colour you want, you can also enter a hex colour code.
7. To revert to using your portal colour scheme, click Use default colour scheme.
8. Click Save changes.
The new colour scheme has been applied to the course, you can view it by clicking Preview course.
Course image
You can customise your courses by associating an image with it. The image is used as the course’s identity in course listings on the portal, it is also used on the course’s main menu screen.
To add a course image, follow these steps:
1. Click on the Courses tab.
2. Search for the course you want to customise.
3. If you’re using a touchscreen device, click the course’s thumbnail or if you’re using a computer, hover the cursor over it.
4. Click Edit course.

5. Click on the Course details tab.

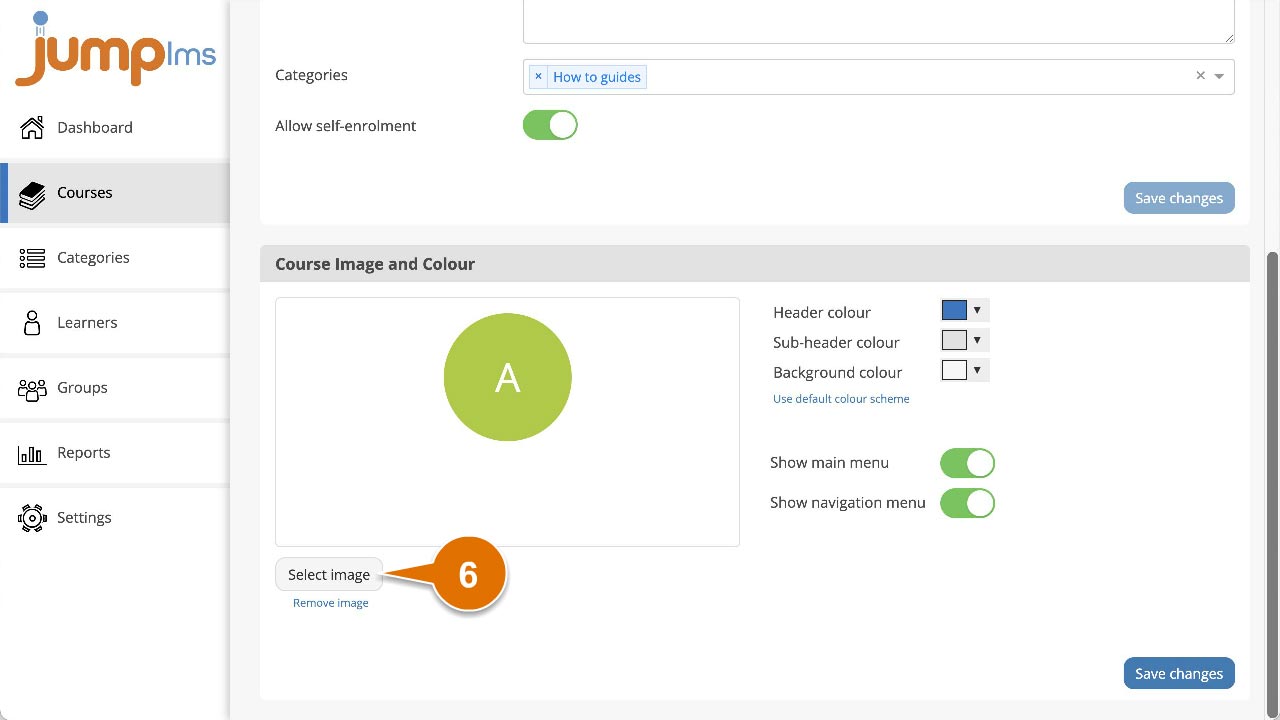
6. Click Select image to open your Resource Library.
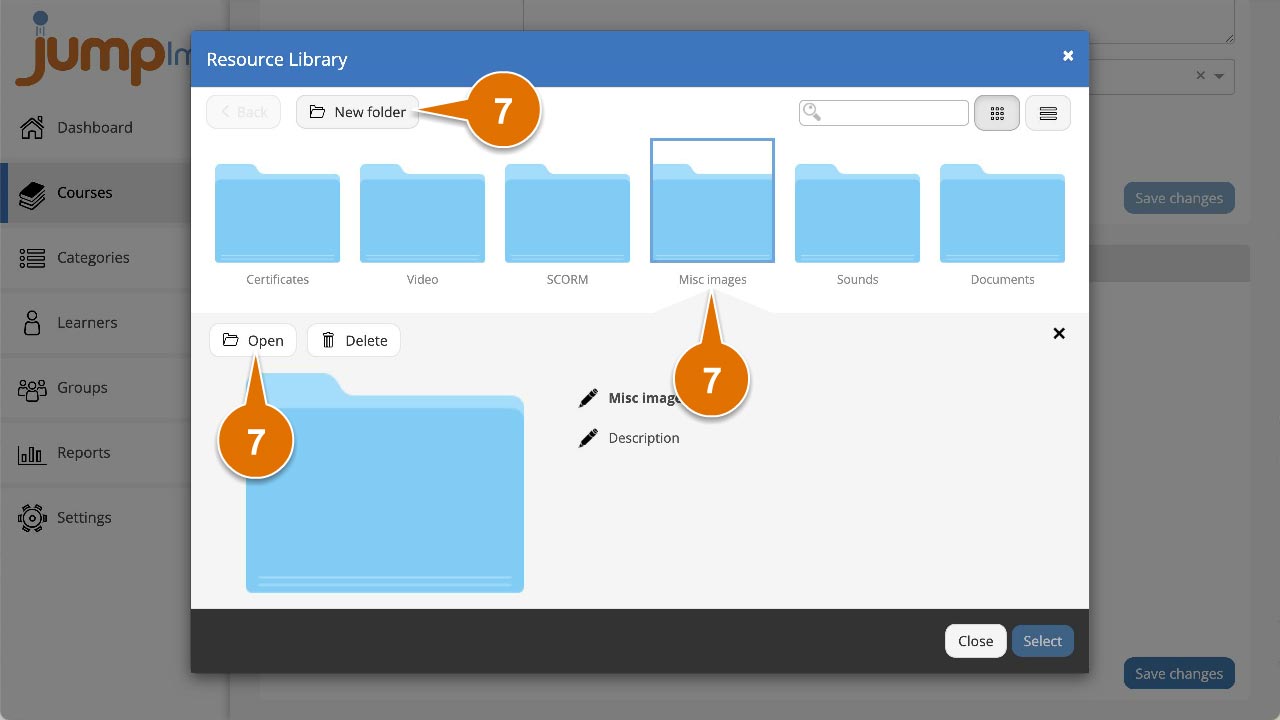
7. Open the folder where you want to import your course image by double clicking the folder icon or single clicking and selecting Open – alternatively create a new folder by clicking the New folder button.
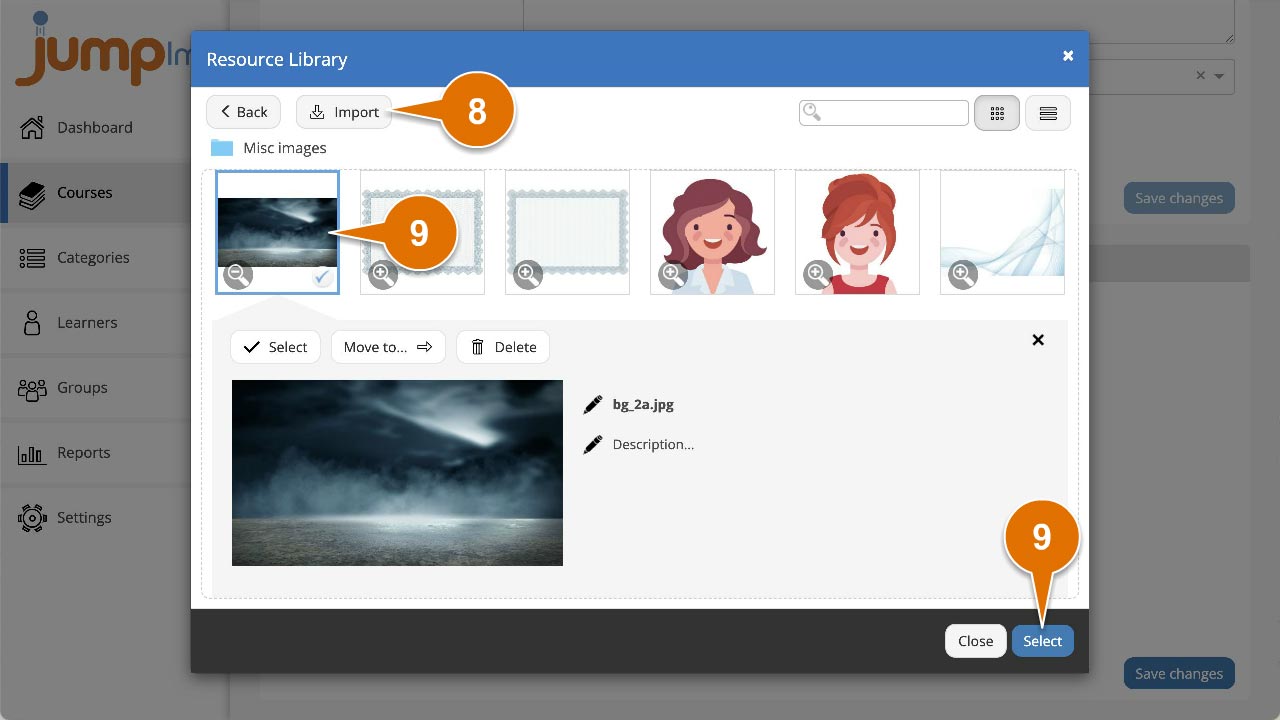
8. Click Import and browse to your course image and click Open or drag and drop the image straight from your computer into the Resource Library.
9. Once the image has been uploaded to your Resource Library, click it to highlight it and click Select.
10. The Resource Library will close then click Save changes.
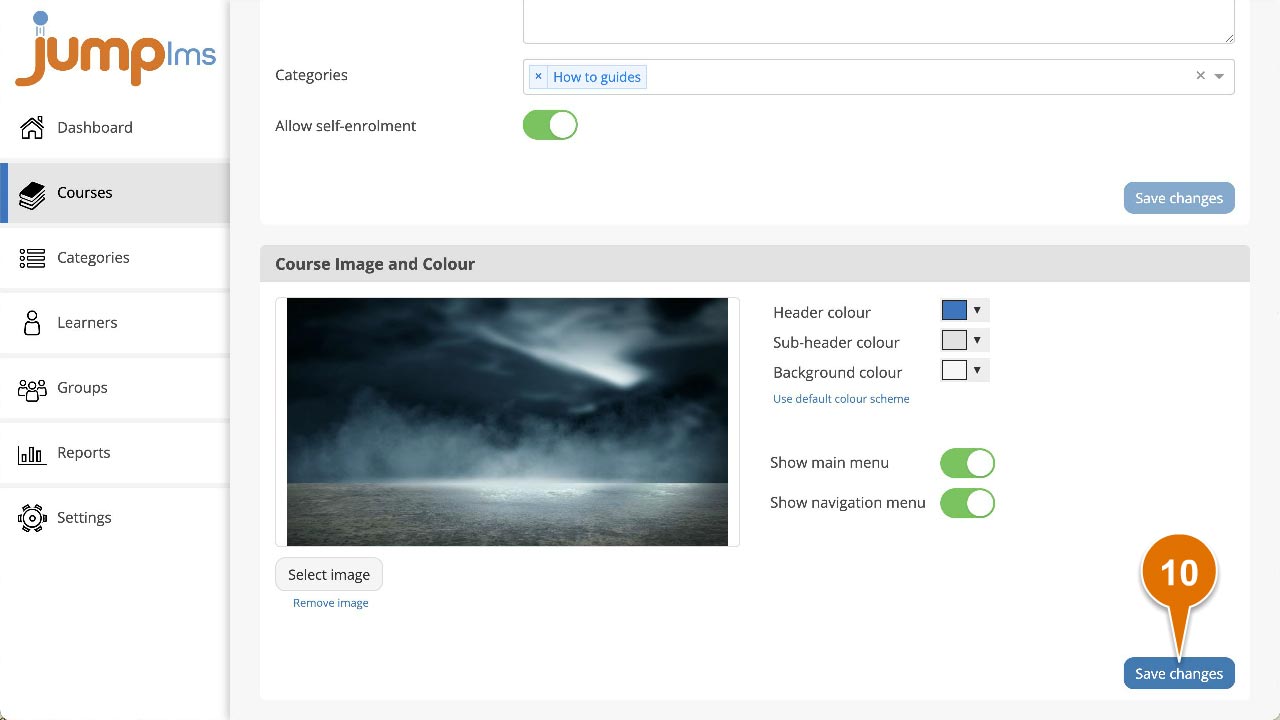
The image has now been applied to your course.