How to display your company logo in the portal
A quick and easy way to customise your portal is to display your own logo. You can upload two versions of your logo, one which is used on a light background and one used on a dark background. JumpLMS is clever enough to know which version to use depending on your colour scheme.
To display your logo in the portal, follow these steps:
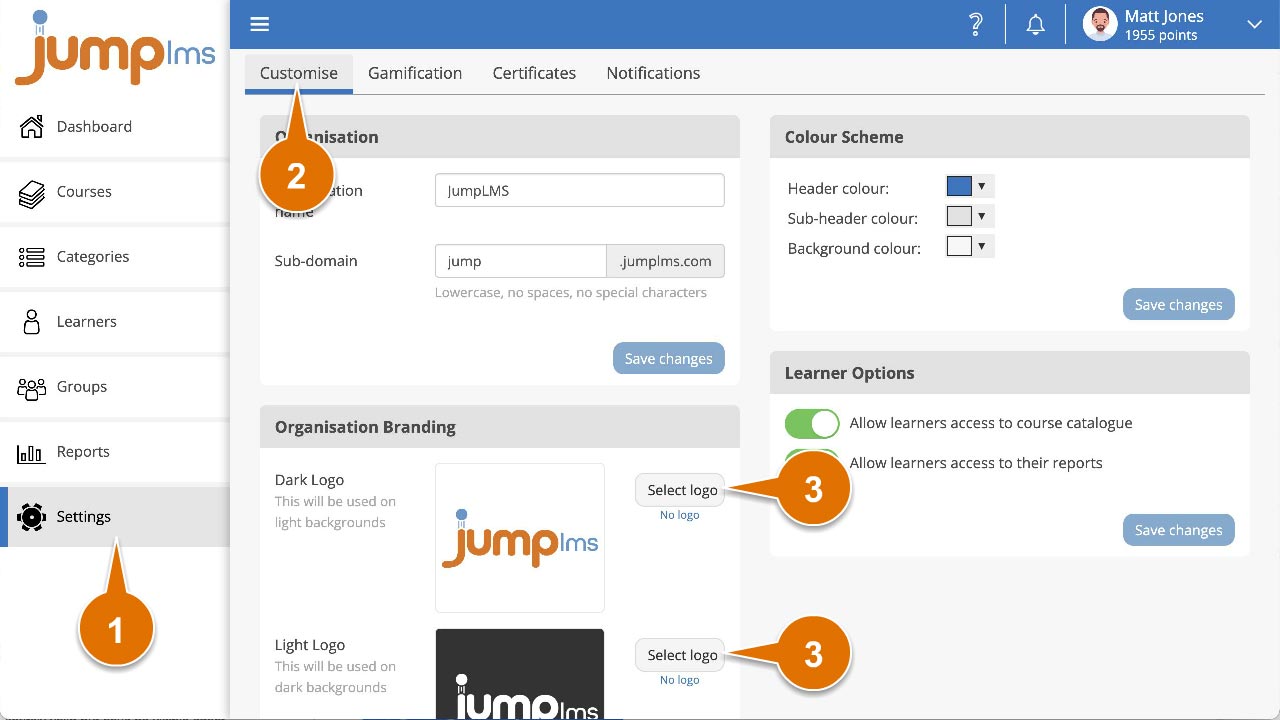
1. Click on the Settings tab.
2. Click on the Customise tab.
3. In the Organisation Branding panel, click Select logo in the Dark logo or Light logo section to open your Resource Library.

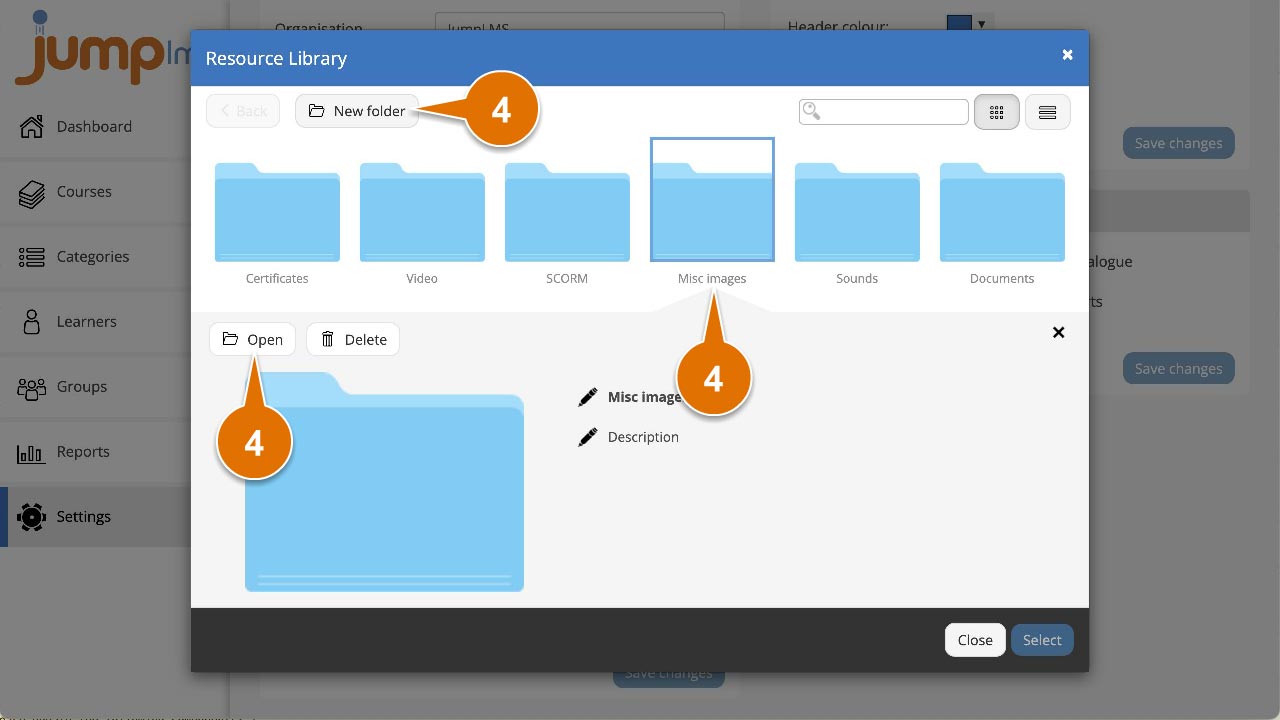
4. Open the folder where you want to import your logo by double clicking the folder icon or single clicking and selecting Open – alternatively create a new folder by clicking the New folder button.

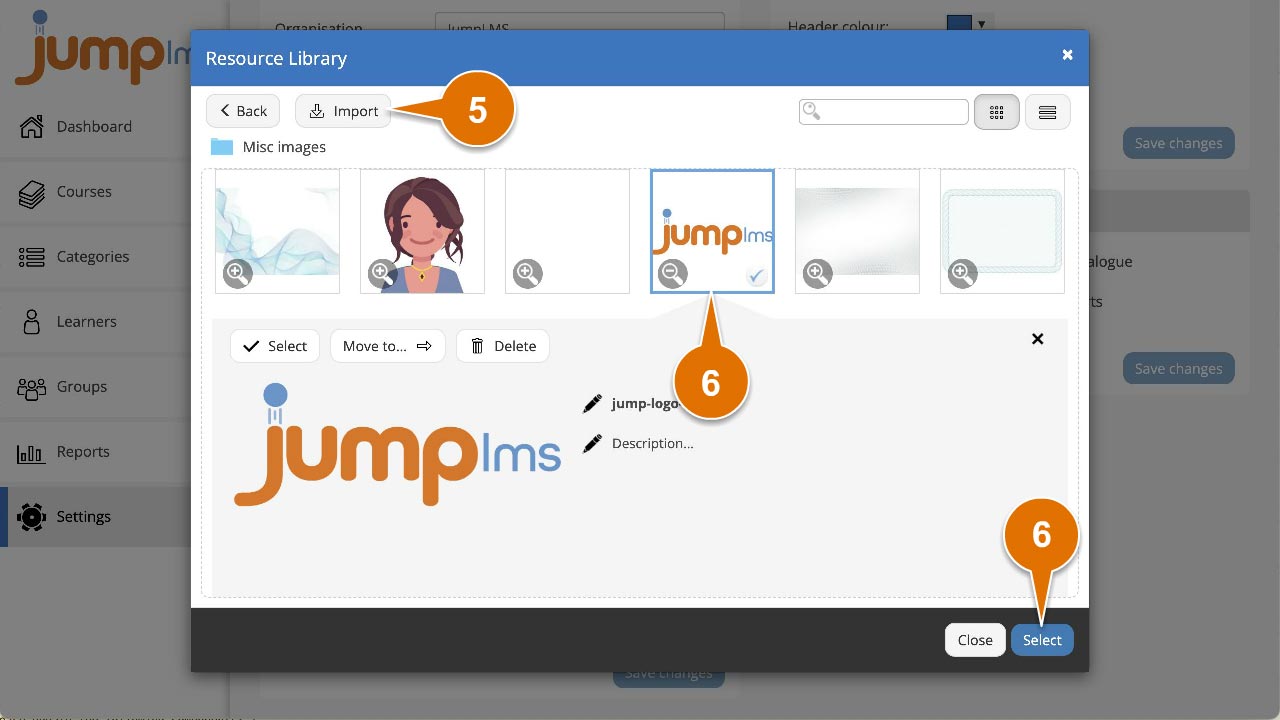
5. Click Import and browse to your logo and click Open or drag and drop the image straight from your computer into the Resource Library.
6. Once the image has been uploaded to your Resource Library, click to highlight it and click Select.

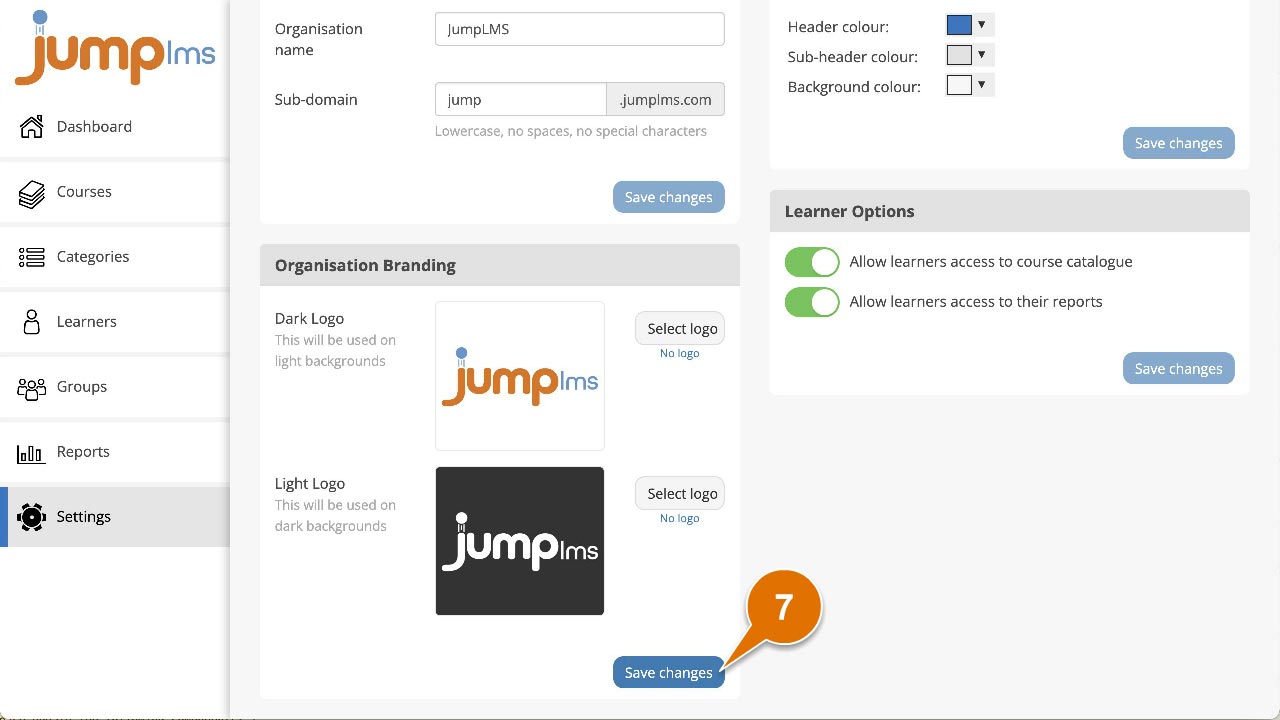
7. The Resource Library will close then click Save changes in the Organisation Branding panel.

Your logo will now be displayed in your portal.