How to add a test element
Checking your learner’s knowledge is an essential part of creating an effective training course. JumpLMS comes equipped with all the tools and question formats you’ll need to build your own tests and examinations to thoroughly appraise your leaners’ understanding of the course material.
Question types include:
- Multiple choice
- Fill the gap
- Dropdown
- Ordering
- Drag and drop
To add a test element to your course, follow these steps:
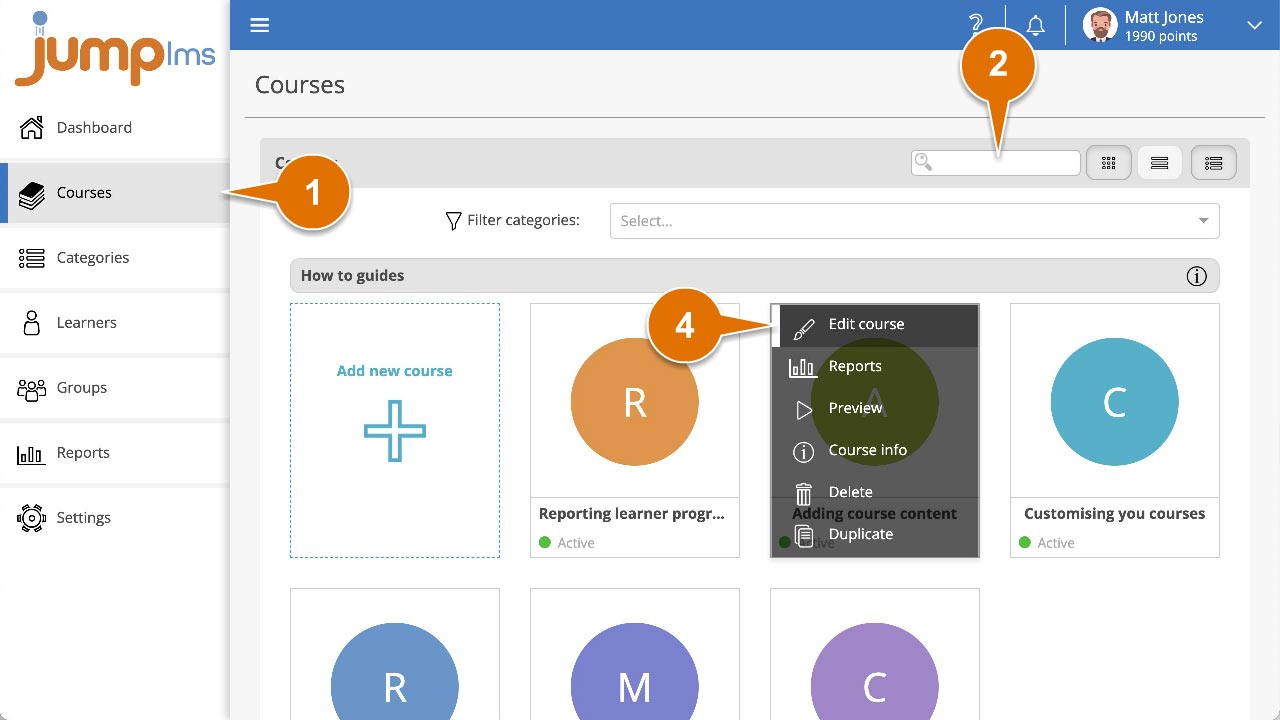
1. Click on the Courses tab.
2. Search for the course you want to add the element to or find it in the list.
3. If you’re using a touchscreen device, click the course’s thumbnail or if you’re using a computer, hover the cursor over it.
4. Click Edit course.

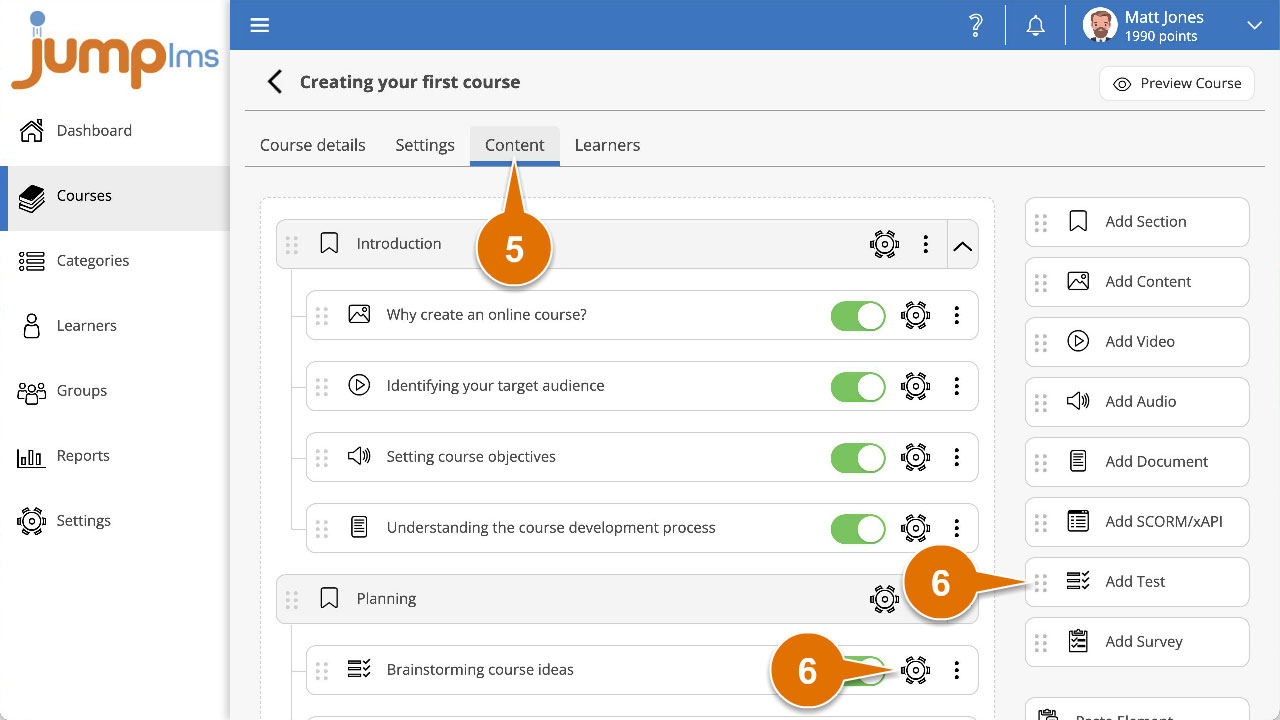
5. Click on the Content tab.
6. Click on Add Test to add the element to the end of the course structure or drag and drop it to the desired place. Then click Edit.

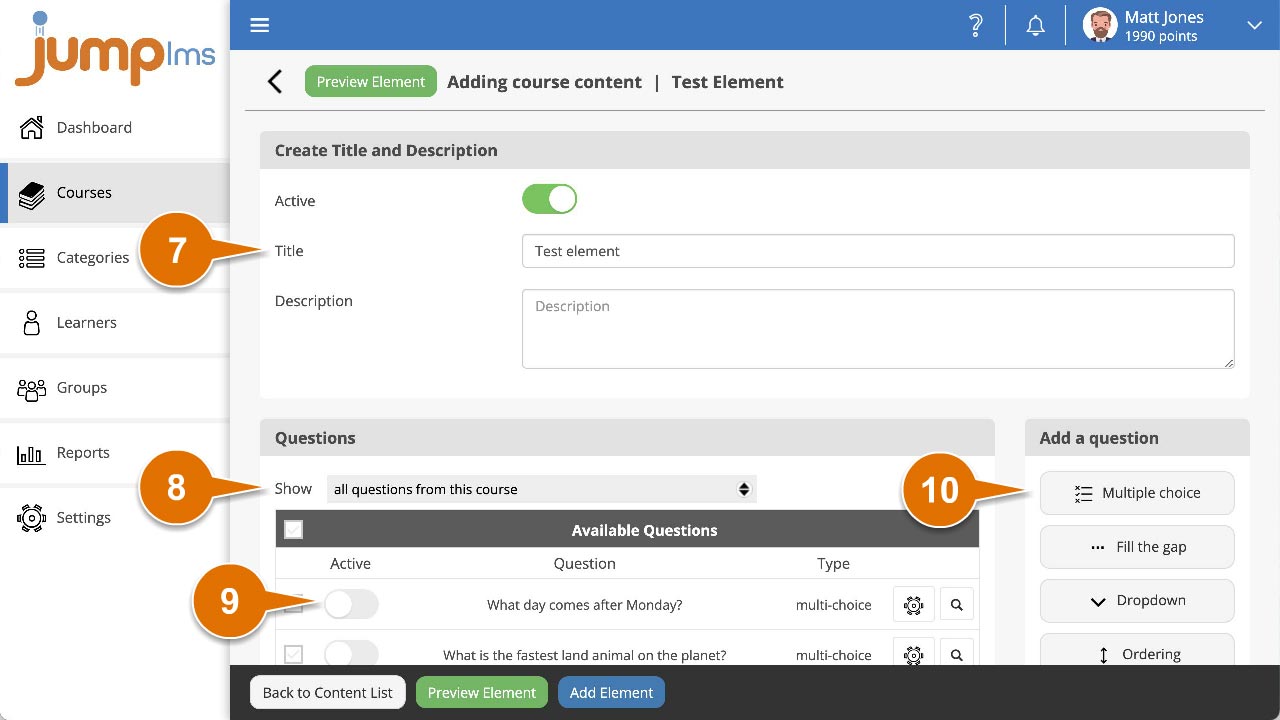
7. Enter a title and description for the element.
8. If you want to reuse questions from your existing courses, you can filter them by the following criteria:
- All questions from this course
- All questions active in this element
- All questions from all courses
- All questions from…(existing course title)
9. Click the Active switch to the on position to add a question to the test.
10. If you want to add a new question, select the appropriate question type from the Add a question list of options and setup the question details.

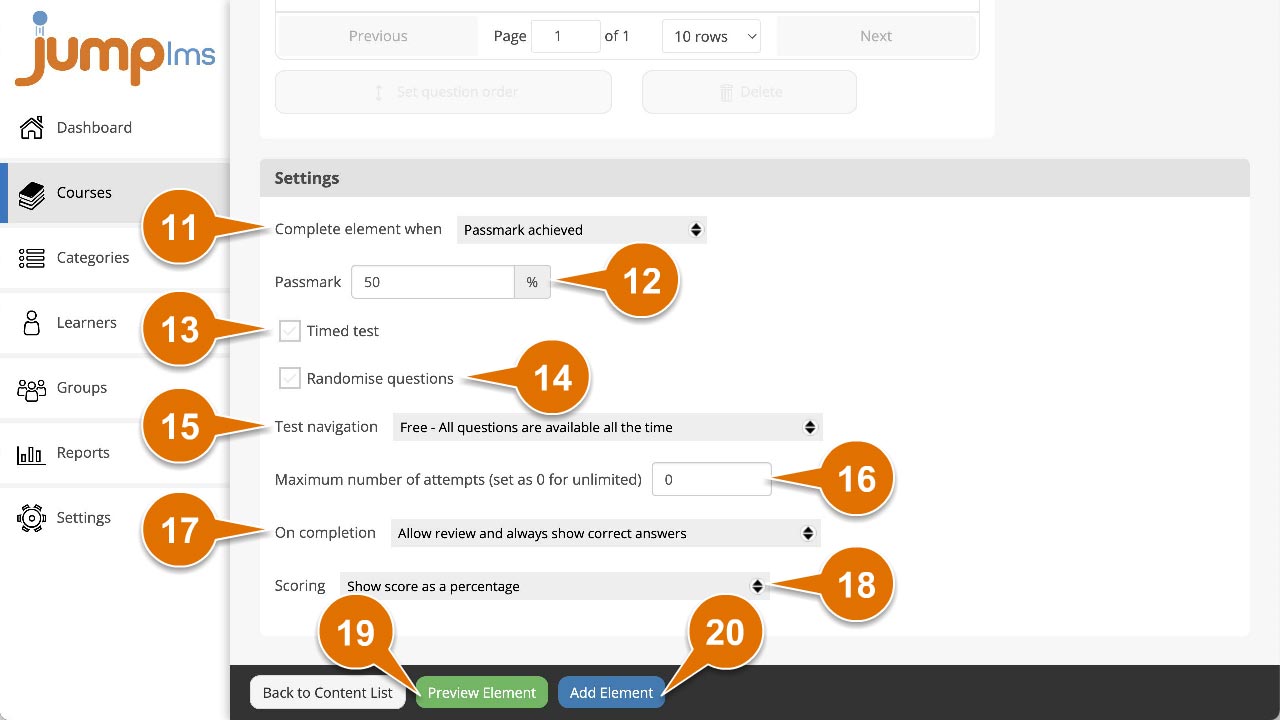
11. You can set the completion criteria for this element in the Settings panel by selecting the appropriate option from the Complete element when dropdown.
12. Enter the Passmark percentage for the test.
13. Tick to select Timed test if you want the test to have a set duration. If it does, enter the required time (in minutes).
14. Tick to select Randomise questions if you want the questions to appear in a random order, leave unticked to show the questions in the order they in your question list.
15. Click the Test navigation dropdown list and select the most appropriate navigation option:
- Free – All questions are available all the time
- Restricted – Learners can’t proceed until previous question is submitted
16. Set the Maximum number of attempts (set as 0 for unlimited).
17. Click the On completion dropdown list and select the most appropriate option:
- Allow review and always show correct answers
- Allow review but only show correct answers if passed
- Allow review but never show correct answers
- Do not allow review
18. Click the Scoring dropdown list and select the most appropriate option:
- Show score as a percentage
- Show score as a number
- Show core as a number and a percentage
- Never how score
19. Click Preview Element if you want to see how the element will look in the course.
20. Click Add Element.

The test element will now be part of your course.